In general, it is always better to remove the old floor covering. You can never be completely sure what the subfloor looks like and how the existing flooring is holding up. Tearing off the floor covering, even in the case of tiles, is always more cost-effective than layering special treasures to lay the new covering on top of the old one. Demolition work is usually quick and does not increase the strength of the floor layer, which is the layer of material above the floor structure that serves to reinforce the floor system, ensuring its strength and stability. In addition, one gains certainty as to the condition of the original subfloor.
However, if for some reason it is not possible or desirable to proceed in this way, it is possible, for example with a tiled or wooden floor, to lay a new covering over the old one if the recommended procedure is followed and the correct products are used. All this while maintaining the same performance characteristics. In the case of vinyl or PVC flooring, it certainly makes more sense to remove the old flooring. But even for these cases, there are products such as contact bridges and gypsum fillers that have been specially developed for these situations. The major disadvantage of the latter two products is the high cost and the uncertain result, so these arguments usually tip the scales in favor of removal.
The decision to renovate a room is always an important one and requires careful consideration of various factors. One of these is the clear height of the room and the thickness of the floor.
Room clearance affects the overall feeling of space and comfort. If a room is low, it can feel cramped and uncomfortable. By increasing the clear height, on the other hand, you can create a feeling of more space and openness.
Floor thickness is another important factor that affects both the look and functionality of a room. The question is, can I reduce the headroom and therefore increase the floor thickness?
Therefore, this consideration should be the first important milestone when you are thinking about remodeling.
For example, if you are only replacing the flooring in one room, you need to consider how the transition between the original and new floor height should be designed. A difference of around 1.5 cm can of course be concealed by a skirting board, 2 cm (or even 3 cm in extreme cases) can be compensated for by a threshold. For larger height differences, there is no other solution than a step, which can make it difficult to move around the room. The transition between rooms also often has to be made barrier-free during renovations, and even if the standard states that a wheelchair can overcome a two-centimeter-high obstacle, such a solution is very inconvenient in practice.
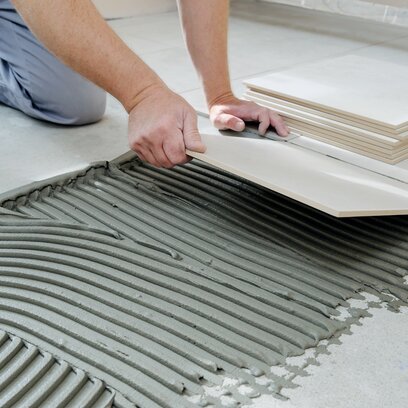
Old tiles that you do not want to remove should be checked thoroughly, especially their adhesion to the substrate. If you hear a hollow sound when tapping, there is a risk that the tiles will come loose prematurely. The first step is to carefully degrease the surface of the old tile; a solution of warm water and baking soda is sufficient. The degreased surface is first coated with Cemix 8040 Contact Bridge, a special penetration coating that forms an adherent layer and increases adhesion for the next layer. Cemix 8260 tile adhesive can be applied directly to the contact bridge, into which the new small format tiles are then laid. An alternative solution is to create a so-called patch with a thin layer of S1 adhesive the day before the actual tiling is laid.
The filler is essentially a trowel that levels the substrate and in turn increases the strength and adhesion of the newly laid paving. It also has a higher dispersion content and better malleability. If the new paving is to have a larger format, a self-levelling compound, such as Cemix 5510, must be applied to the contact bridge to ensure a perfect level. After curing, the screed is sanded, dusted and re-primed. Only then is the subfloor ready for the installation of large-format coverings.
In addition to tiles, other floor coverings such as PVC, vinyl, carpet or even wood can be laid on the flowing screed.
Wooden floors are very popular these days, and if it's just a little bit possible, it's always better to renovate and revitalize them. Renovating and revitalizing a wooden floor can give it a completely new look and extend its lifespan.
However, there are situations where it is desirable to preserve the original floor and lay new flooring directly on top of it. During 2024, we will be expanding our product portfolio with a system that allows new flooring to be laid over older wooden floors. This is a cement-based system with an additional glass fiber reinforcement and dispersion. The wooden subfloor must be stable at the time of installation of this system, it must not bend and the planks must not shear. The wooden subfloor must therefore always be reinforced, fixed and leveled, as otherwise not only the applied adhesive may crack, but also defects in the newly laid floor itself, e.g. when laying ceramic tiles. The wooden floor must therefore be additionally and more firmly bonded to the subfloor, and if it is still sagging too much, it may need to be dismantled and the subfloor checked in some places.
The surface of the original wooden floor must be sanded to even out its absorbency and it must also be carefully dedusted, primed and then levelled with a self-levelling compound.


